 GEOLY Docs
Basic Management Function
GEOly Basic Management Guide
Where to start: Sign in to GEOly, then use the left navigation and current brand menu to configure your workspace.
This guide covers the account, organization, brand, and monitoring settings used in the current GEOly product. Completing these settings helps GEOly identify your brand consistently in AI answers, keeps Monitoring scoped to the correct brand, and prevents teams from working in the wrong workspace.
1. Sign in and confirm your workspace
Open app.geoly.ai and sign in. Before changing settings, confirm the organization, plan, and active brand shown in the workspace.
Your available data and actions depend on:
- the organization you are working in;
- the active brand;
- your account permissions; and
- the plan and data scope available to that workspace.
Switching brands changes the scope used by Workbench, Monitoring, Analysis, and brand settings. It does not merge data between brands.
2. Switch brands and open Brand settings
Use the brand menu in the left navigation to:
- view the active brand;
- switch to another authorized brand;
- choose Add Brand when your account has permission to create another brand; and
- open Brand settings for the current brand.
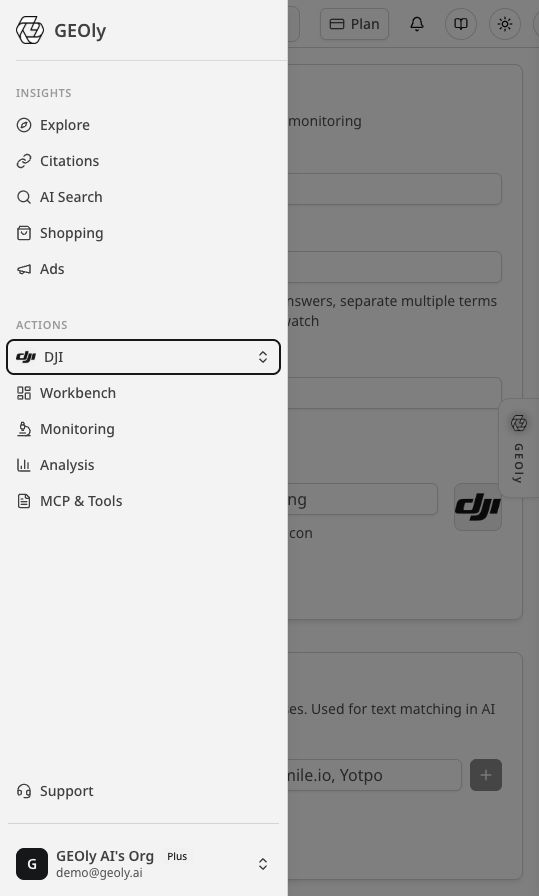
After switching, confirm the brand name shown in the product before creating Prompts, competitors, or monitoring tasks.
3. Configure brand information and matching rules
The current Brand settings page includes:
- Brand Name: the name shown in GEOly.
- Match Terms: brand names, aliases, product names, and spelling variants used to detect mentions in AI answers. Separate multiple terms with commas.
- Website: the official brand website URL.
- Logo URL: optional; if empty, GEOly can use the website favicon.
- Competitors: brands you want to compare in AI answers.
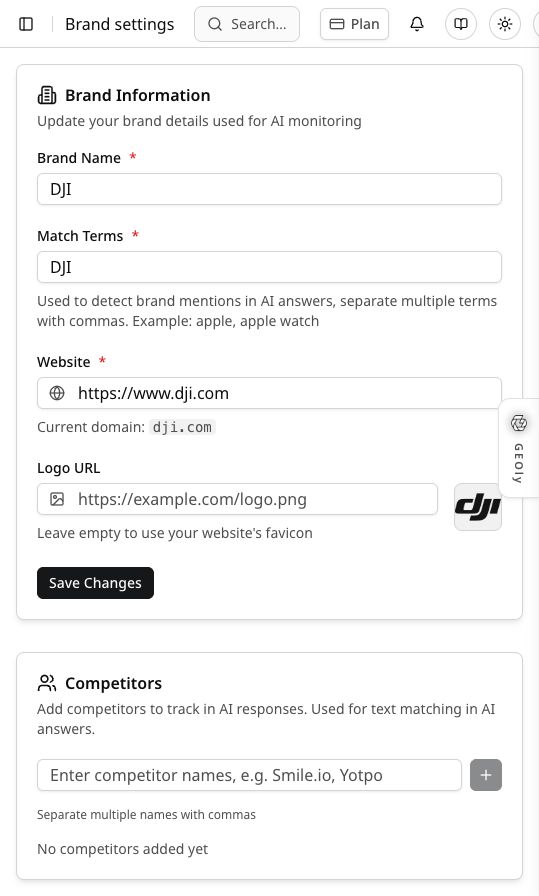
How to write Match Terms
Include the official brand name, common spelling or capitalization variants, important product lines, and common short names.
Example: dji, DJI, Osmo, Mavic.
Avoid generic words that are not unique to your brand. Overly broad Match Terms can increase false matches. Save the settings, then review later Monitoring results to confirm that brand detection is accurate.
How to set the Website
Enter the official site URL and confirm the domain. The Website field is part of the brand profile; it does not prove that every AI answer cites the site or that the site receives recommendation traffic.
4. Manage competitors
Add competitors in the Competitors section of Brand settings.
GEOly uses configured brand names and aliases for text matching in AI answers. To keep comparisons useful:
- add brands that are genuinely relevant to your market;
- use stable, recognizable names;
- add common aliases when needed; and
- remove competitors that are no longer relevant.
The competitor list supports comparison inside the available AI-answer data. It is not an automatic discovery of the entire market and should not be treated as a complete market ranking.
5. Organization and account permissions
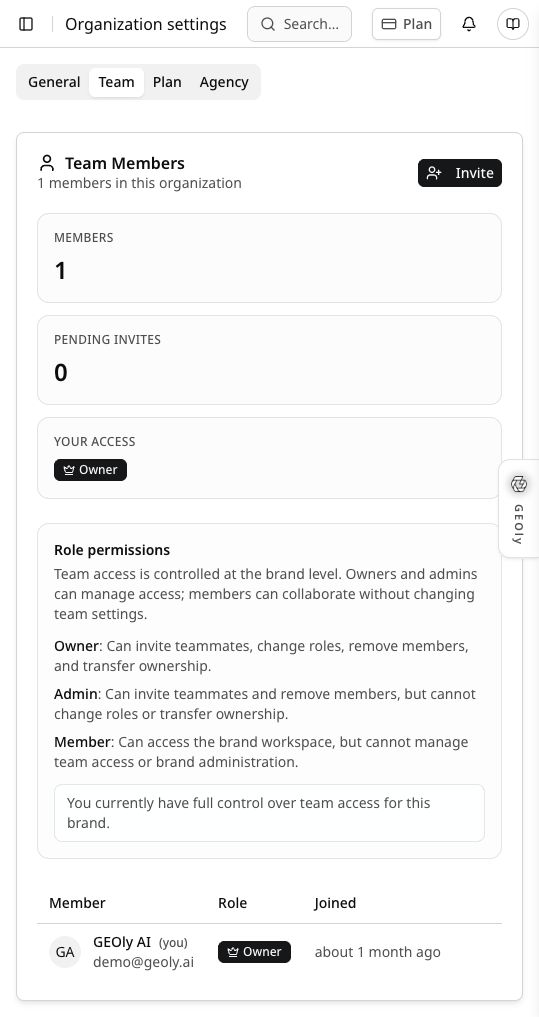
The organization, plan, and account permissions determine which brands, data, and actions are visible to you.
When collaborating:
- confirm that each member is in the correct organization;
- check the active brand and data scope before interpreting results;
- grant only the access needed for the task; and
- use the controls shown in the current workspace rather than assuming every account has the same management menu.
If an organization or member-management control is not visible, it may not be available for the current account, plan, or workspace. Changes involving organization access or permissions should be performed by an account that has the relevant authority.
6. MCP and external AI clients
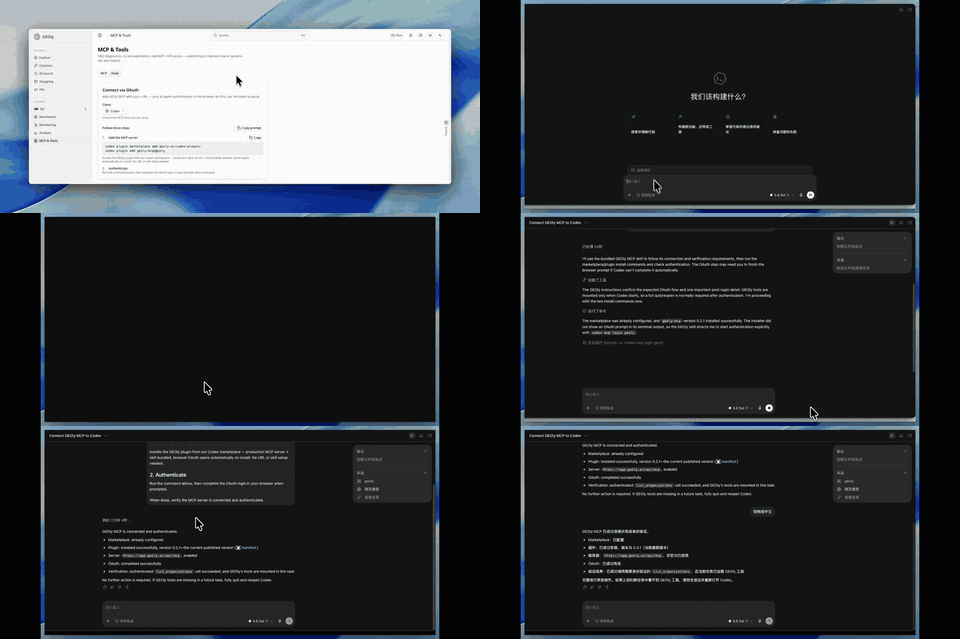
The current MCP entry point is:
Left navigation → MCP & Tools → MCP
GEOly MCP uses a remote MCP URL and OAuth. On first use, the AI client opens a browser for authentication; there is no static token to paste. Select the client in the MCP tab and copy the configuration generated by the current page. The MCP page is the source of truth for the current client configuration.
For client setup, OAuth scopes, and MCP Credits, see the GEOly MCP Guide.
MCP authorization controls which GEOly resources an external client can read or write. Brand settings controls the current brand profile and matching rules. These are separate permission surfaces.
7. Recommended first-time setup
- Sign in and confirm the organization, active brand, and plan scope.
- Open Brand settings and review Brand Name, Website, and Logo URL.
- Add complete Match Terms and save.
- Add the competitors you want to track.
- Create or review Monitoring Prompts, platforms, and date ranges.
- Run a read-only check to confirm brand detection and result scope.
- If you need an external AI client, open MCP & Tools → MCP and complete OAuth.
8. Common issues and data boundaries
- A brand may be missing because a Match Term is incomplete, the spelling differs, coverage is limited, or the query scope is different.
- A competitor may be absent because of name matching, platform, language, date range, or sample coverage; absence does not prove that the competitor does not exist.
- AIGVR, Mention Rate, and Citation Rate are monitored-brand signals. Do not mix them with public-industry SoM, AI traffic estimates, or estimated revenue.
- Updating brand information, Match Terms, or competitors does not by itself prove a change in ranking, traffic, conversion, or revenue.
- Review original AI answers, official website information, and first-party business data before making an important decision.
After the initial setup, run a read-only Monitoring check and adjust Match Terms, competitor names, or Prompt scope based on the observed results.